Ohhh guided math. How I love you.
This year my school has had a giant focus on math. We have been doing a lot of PD days learning the text book and figruing out how to make it work in our classrooms. This past October, I was lucky enough to be able to see the famous Nicki Newton and listen to her methods and ideas. They were Fan-Ta-Stic!
So, there I was. A billion ideas gushing out of my brain, without a hot clue how to set it up in my classroom. I am very picky with organization of my class and how I do things, set them up, and how I want them to look. That being said, I knew I had a few things to keep in mind.
1. I wanted it to be easy for students to do independently
2. I wanted students to have some sort of accountability to their work
3. I wanted to be able to differentiate it without being there with my students 100% of the time
4. I wanted it to last a long time so that I don’t have to keep making these things over and over
Well, I did it. I got it all set up.
Here goes.
Before we do our guided math groups, I work with my students on the skill or concept that I am teaching. This is where I assess my students and group them accordingly. I also introduce the games that we will be playing throughout the week so they know what to do during their ‘math with someone’ time.
Every day, before we break off into our groups and work on our skills together as a class – usually 5-10 minutes
I have 3 stations that students visit daily.
Math with someone
(I have plans to add one more station, but have not gotten it set up yet)
-Math with Technology
The Groups!
I have 3 groups currently when I separate my students. When we do our rotations, I begin by working with my lowest level of understanding kids, then mid level and high very last where I usually extend their knowledge further.
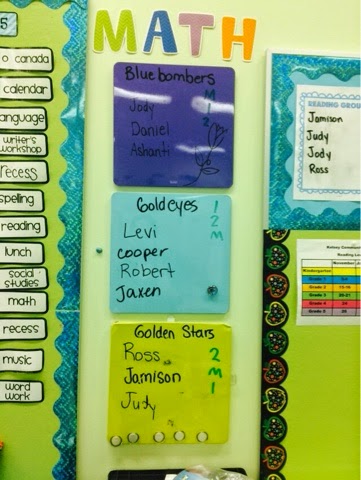
The Purple Group
Team names change all the time. Students get to choose their team name which makes it way more fun! The purple group is my lower level group. They always start at my macaroni table. During this time, I help them to learn and understand our current concept or skill.
These children begin groups with me, move to math by myself where they take the skills I just gave them and apply them to that work. This group will end off at math with someone where they play the games that help with these skills.
The Blue Group
The blue group is my strongest group of kids. They are the last group that I see when we do our math groups. The begin with ‘Math by myself’ because they can generally handle the content that has been given, and doesn’t need much more instruction than is on the worksheet.
The Green Group
The green group is my middle skill levelled group. They start at “math with someone” where they where they play a game to help them gain understanding on our concept.
Now. Lets get to the good stuff! How things work.
3 stations
15 minutes at each station
3-4 kids in each group
Math with my Teacher
For Math with my Teacher, I always start off with my lowest levelled kids. This is where I record in my notes what they can do, what they struggle with, and what we covered so that I can plan and prepare for the next day. When we rotate, the kids that start at ‘math with my teacher’ will automatically go to math by myself where they can apply the skills and strategies they just learned onto paper. My mid-levelled kids come to me next, and lastly I will see the kids with the most understanding, and we will extend their knowledge even further. We play games, I ask questions that challenge them and we learn together.
Math by Myself
When kids are at the ‘Math by Myself’ station, they will work on paper work independently. This is where they will do a worksheet – or an interactive journal page to demonstrate their knowledge. In the beginning, we do the T-chart to talk about expectations of students, what they should do if they need help, what their voices should sound like and any questions that students may have. At this station, students will also keep track of their work. Below is what my whole math trolly looks like in rest mode. It has 2 of the stations on it. Math by myself and math with someone.
Overwhelmed?
Its not as hard as it seems… Lets break it down.
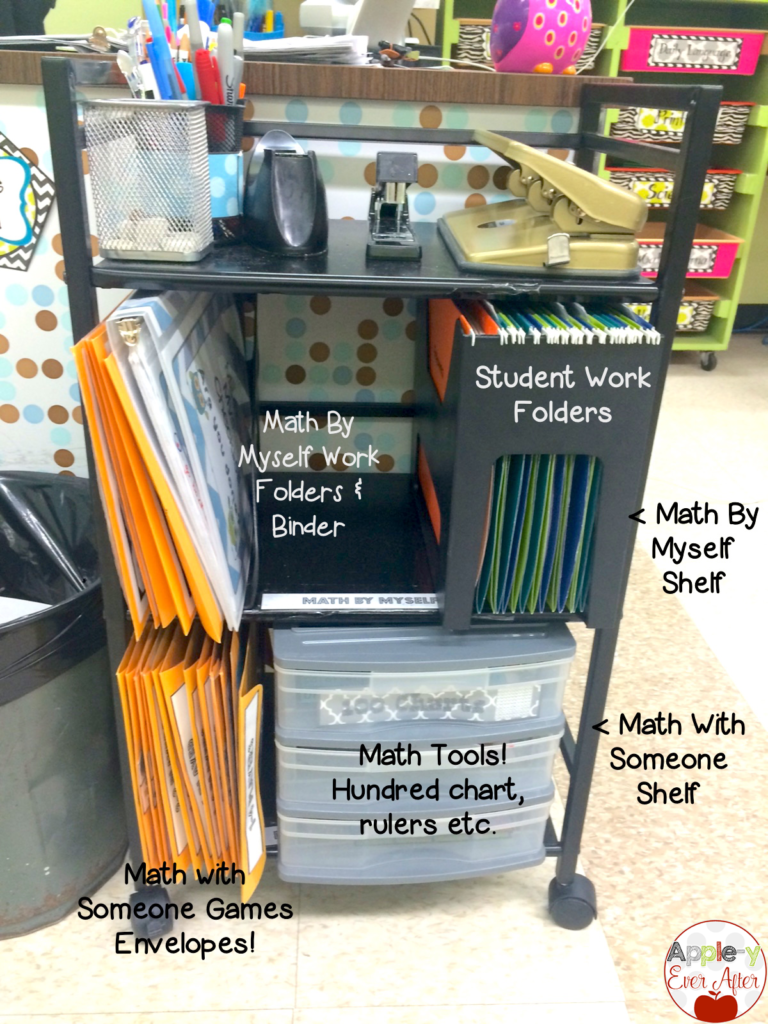 |
Middle Shelf – Math by Myself – Work envelopes and Student work folders
Bottom Shelf – Math with Someone Games – Extra Tools! |
Student Work & Accountability:
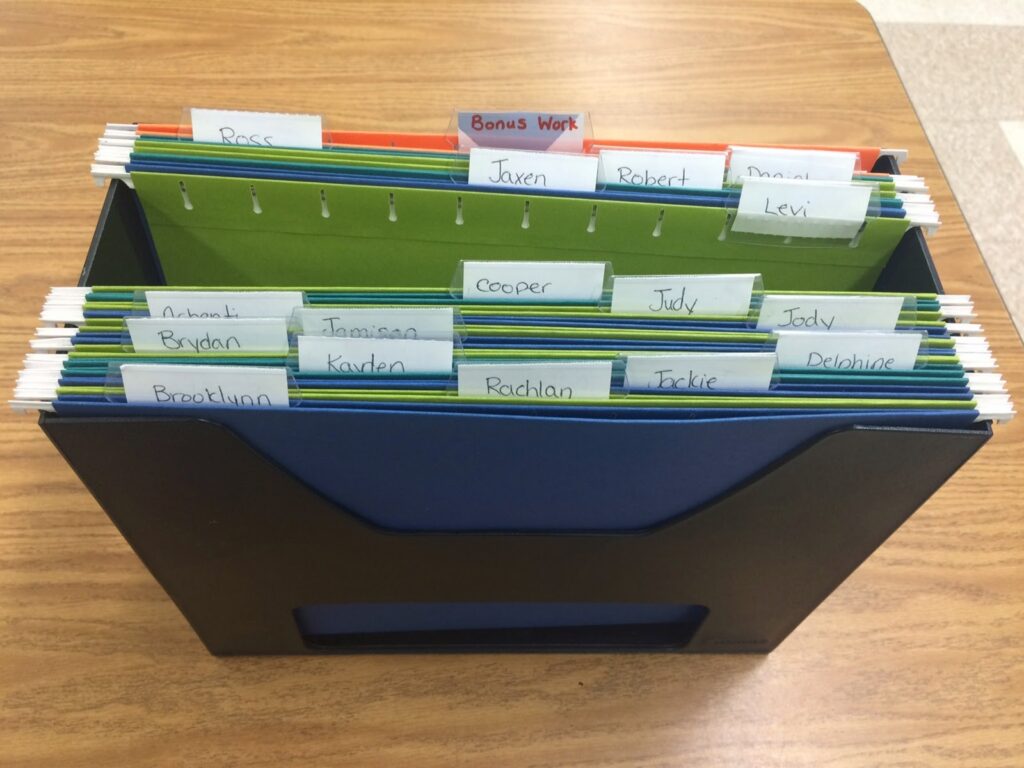
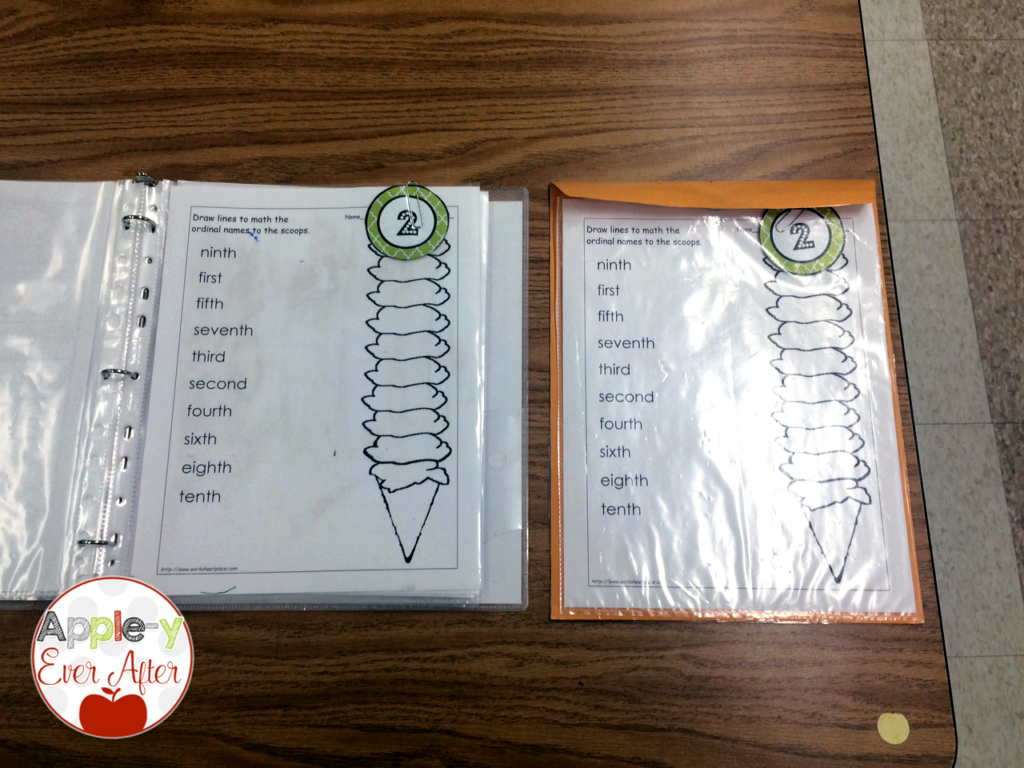
At ‘math by myself’ students have 5 jobs they need to complete that relate to the strand or strategy that we are working on. This work is kept on my trolly on the math by myself shelf (shown above). The work is inside numbered folders that look like this.
 |
| Front Cover – Contains the rules of ‘Math by Myself’ and shows them where to keep their work.
|

|
| The Back shows what work is inside the envelope and what number it matches with so students don’t get confused as to which task they are working on. |
|
The back of the envelope has a page protector attached to keep a visual of the different tasks so students don’t get mixed up between tasks. I also added a velcro dot to the bottom of the page protector so if I feel that an answer key is necessary for the task (so students can understand better what they need to do) they can lift the page protector up and view the answer key on the back.
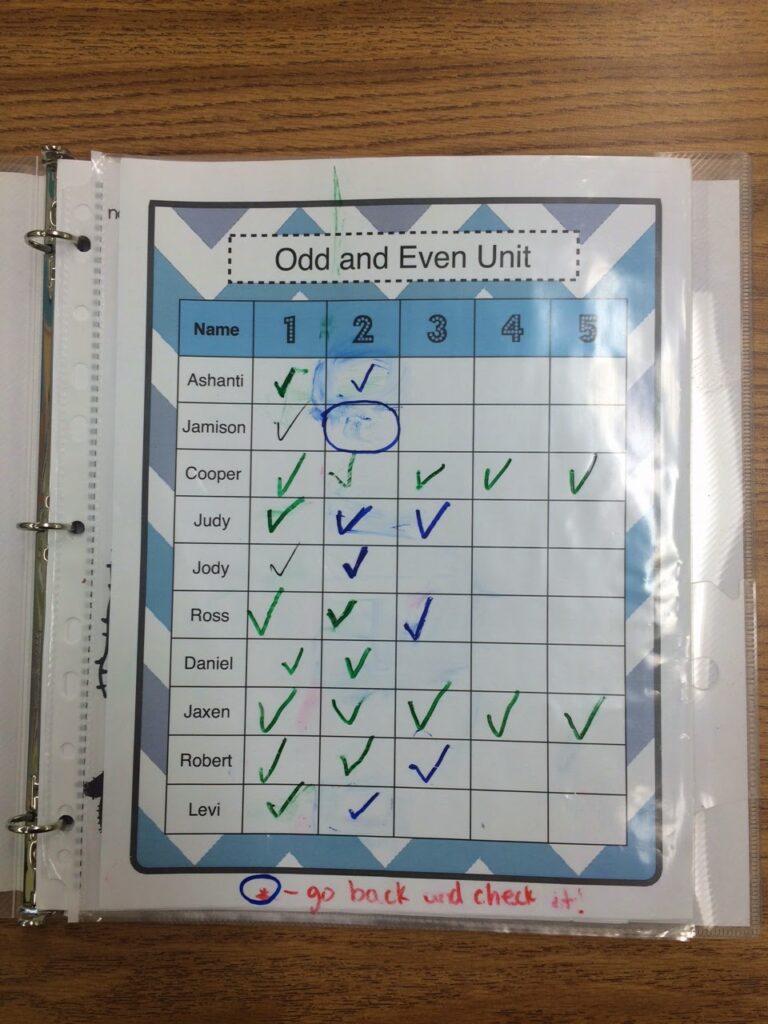
Students will complete these tasks and check them off in the ‘are you done binder’ when they finish. This binder is also on the math by myself shelf.
The ‘are you done binder’ contains these things:
Page 1 – “Are you done?” Checklist
Page 2 – “Are you done?’ Mark sheet – shows students their marks for each task.
Page 3-7 – Work sheet examples.
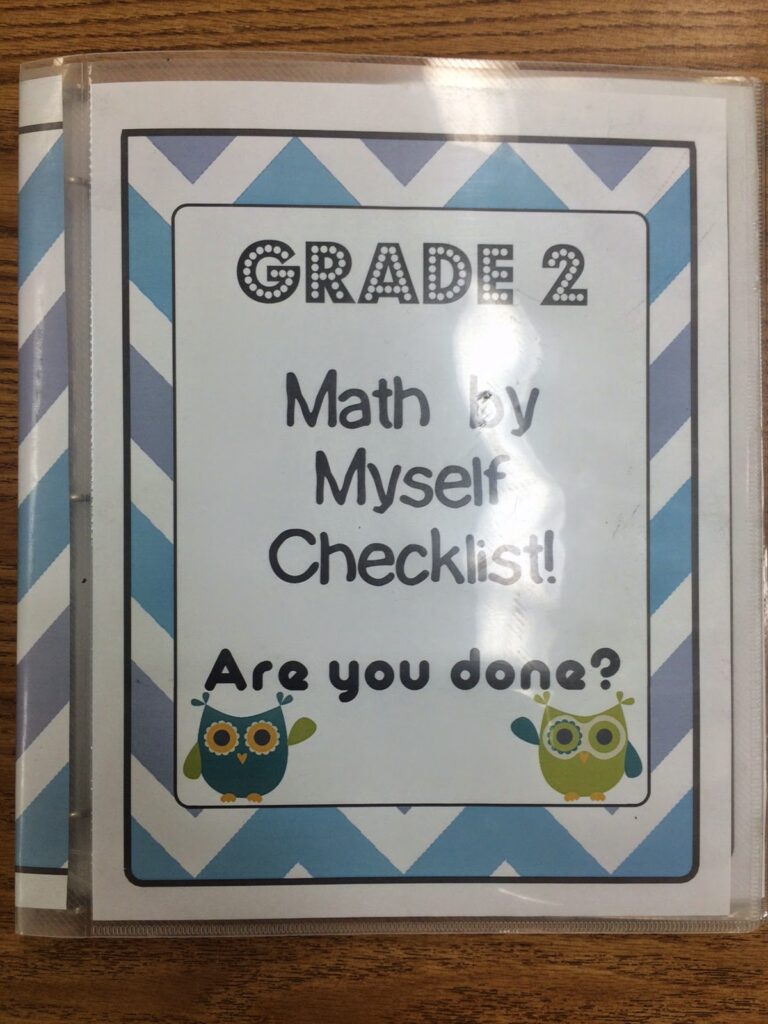 |
| Are you done? Student binder |
|
Row 3 – Math with Someone – Games Folders |
 |
| Inside the binder – and the accompanying work folder so students know what job they are on. |
When students are done, their work is all kept neatly in their work folder. This way I can go and see how that student is doing on their work and adjust their groupings accordingly.
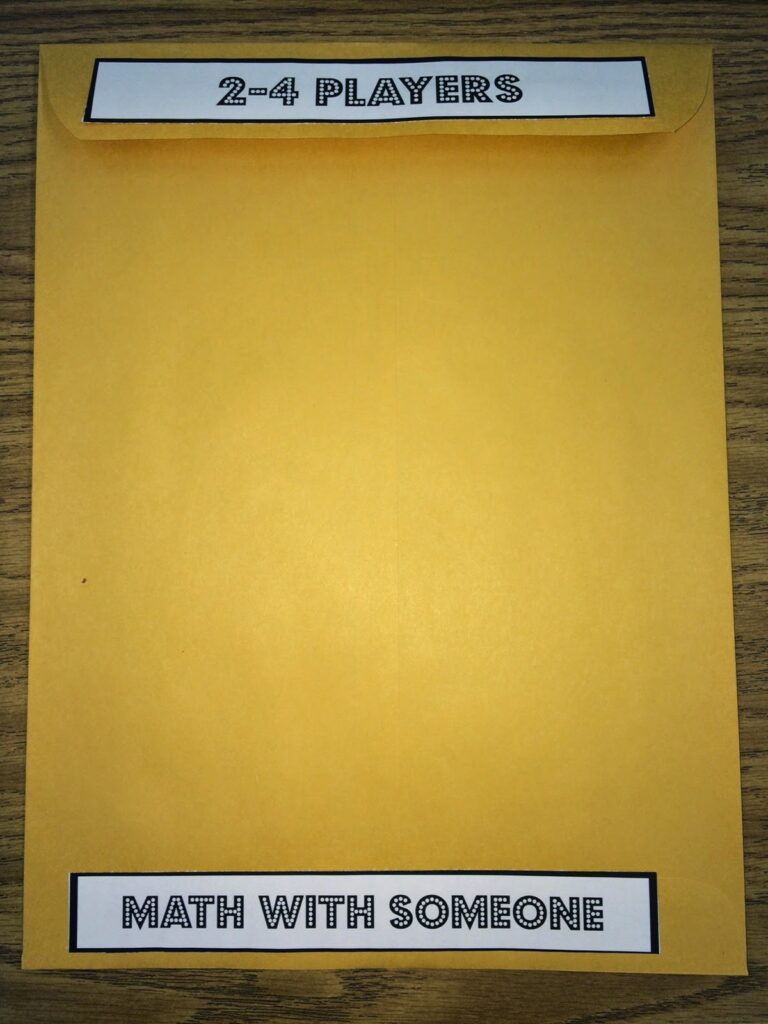
Math With Someone
My favourite group! At last.. the games!
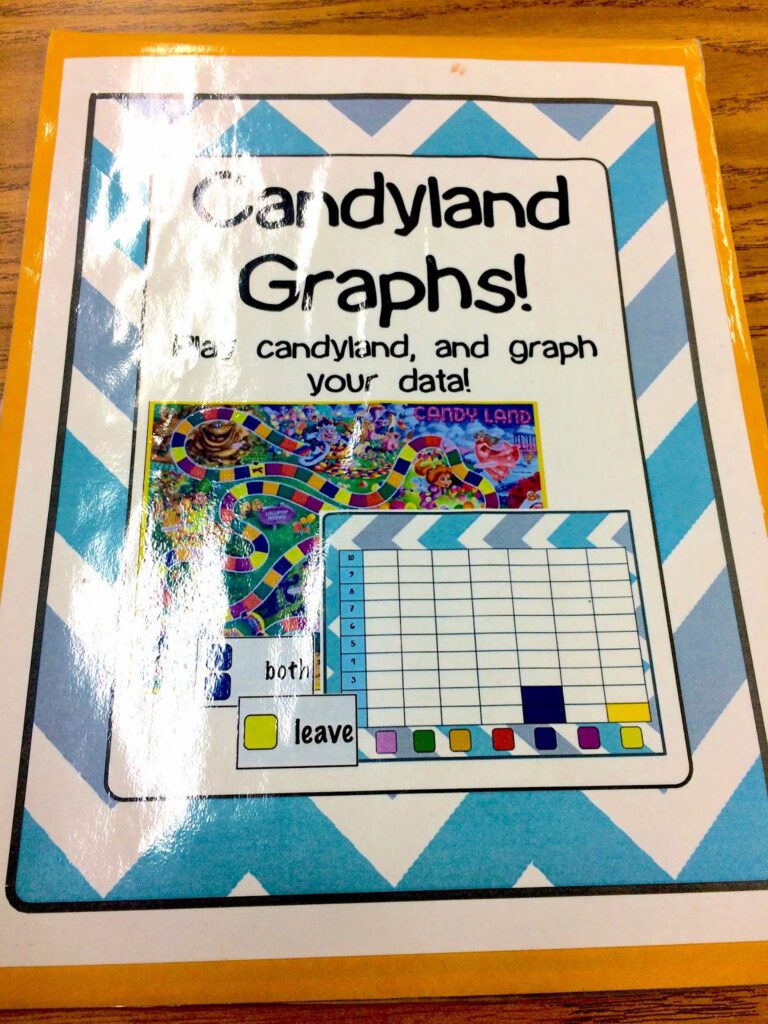
For ‘math with someone’ my students get to work on the concept or strand with a friend or group. Students get to choose from several different math games that I have created or bought.
For a full guide on how to make these math envelopes, visit
THIS PAGE.
Here are some of my math games.
My collection is growing all the time. If you want to view my math games, you can visit
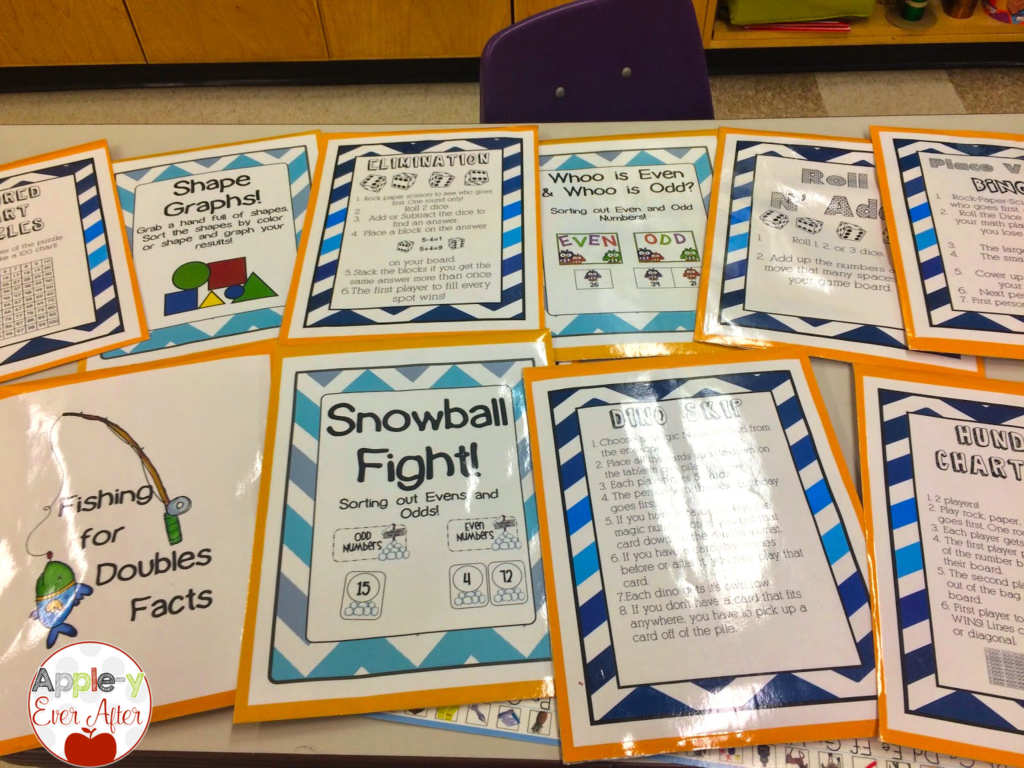 |
| Games are added or taken away based on what we are learning about. New games are added for every concept. Old games are taken out or added back based on what I want my students working on. Games are also brought back if students want to play them during free time or just need to brush up on a skill.
|
For math with someone, everything students need is kept in our math cupboard. Each game envelope tells the rules of the game, how many players and what materials that are needed for students to work independently and quietly.
 |
| Math with someone just tells the students which shelf to put this back onto. |
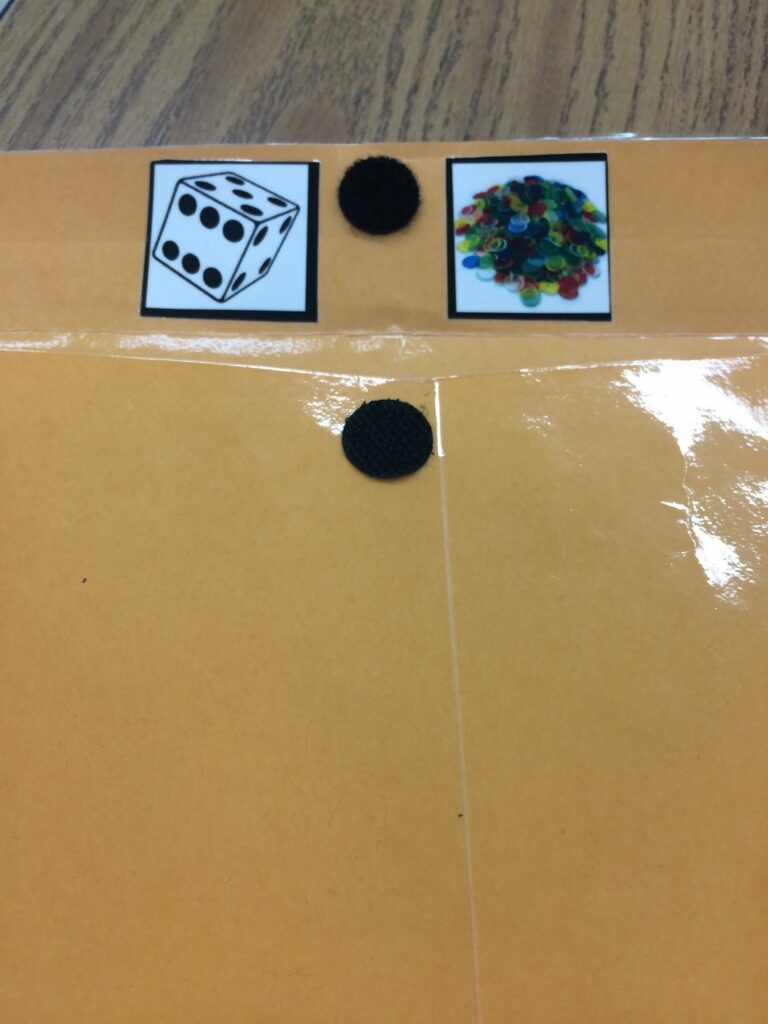 |
| Students can tell exactly what they need just by looking under the flap. |
 |
| My math cupboard.. Everything is labeled so students know where it is kept! |
I hope this tutorial helps to make your guided math work smoothly. If there is anything you don’t understand, or have questions about, feel free to comment or send me an email! My email link is in the sidebar!